


Cutting acrylic successfully depends on three things: selecting the right tool, controlling heat and vibration, and supporting the sheet correctly. Different thicknesses and cut shapes require different cutting methods.
Introduction to Acrylic Sheets
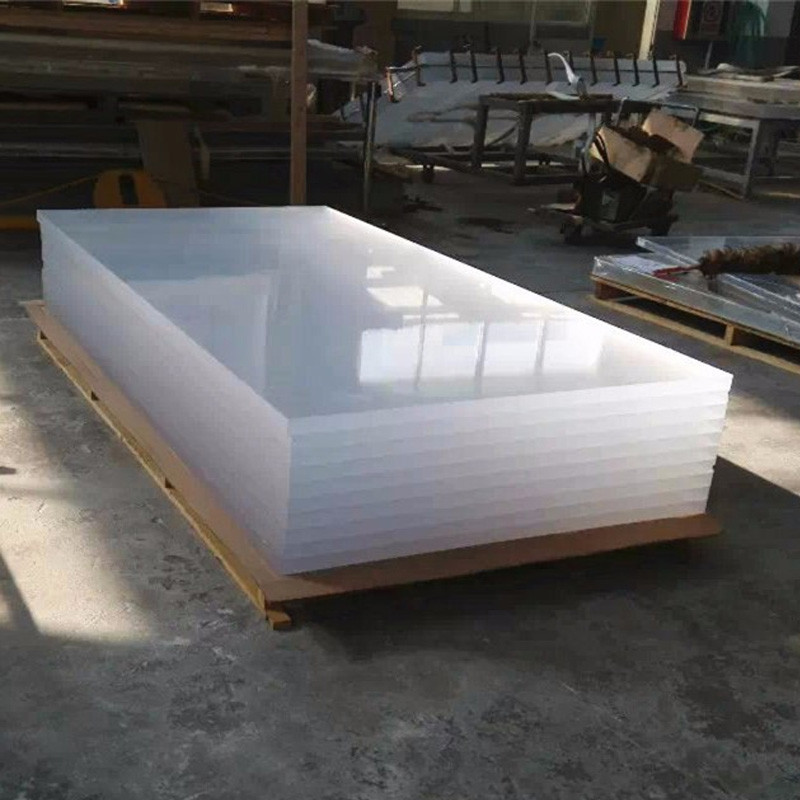
Acrylic sheet, also known as PMMA or commonly referred to as Plexiglas, is a transparent thermoplastic widely used as an alternative to glass. It combines good optical clarity, relatively low weight, impact resistance, and easy fabrication.
The two most common manufacturing types are cast acrylic and extruded acrylic. Cast acrylic is often selected for applications requiring good optical quality and machining performance, while extruded acrylic is commonly used where consistent thickness and efficient large-volume production are important.
Acrylic sheets are widely used for signs, display stands, protective panels, lighting components, partitions, architectural elements, fabrication projects, and many other industrial and commercial applications.
Why Acrylic Requires Special Cutting Methods
Acrylic is easier to fabricate than glass, but improper cutting can still cause chipped edges, cracks, melting, or surface damage.
- Heat Sensitivity: Excess friction can heat the cutting edge and soften or melt the acrylic.
- Vibration: Poor sheet support can cause vibration, resulting in rough edges or cracking.
- Cutting Pressure: Excessive pressure can introduce stress around the cutting line.
- Blade Selection: Coarse or unsuitable blades can increase chipping.
- Surface Protection: Protective film should normally remain on the sheet during fabrication to reduce scratching.
Tools for Cutting Acrylic Sheets
The correct tool depends mainly on acrylic thickness, the shape of the cut, production quantity, and required edge quality.
How to Cut Acrylic Sheets
Scoring and Snapping Thin Acrylic
Measure carefully and use a straightedge as a guide.
Use an acrylic scoring knife and make several controlled passes along the same line.
Place the scored line along the edge of a stable table or workbench.
Apply controlled downward pressure to break the acrylic along the scored line.
Straight Cuts with a Saw
A table saw or circular saw is generally more suitable for thicker sheets and long straight cuts. A fine-tooth blade designed for plastic can help reduce edge chipping.
- Measure and mark the cutting line clearly.
- Keep the protective film on the acrylic when possible.
- Support the full sheet to minimize vibration.
- Secure the material so it cannot shift during cutting.
- Maintain a stable and consistent feed rate.
- Avoid forcing the acrylic aggressively through the blade.
Curved Cuts with a Jigsaw or Bandsaw
For curves and irregular profiles, a jigsaw or bandsaw provides better control than a circular saw. Use a blade suitable for plastic with relatively fine teeth.
Mark the required profile before cutting and work steadily around the curve. Very tight corners may require additional trimming or routing after the main cut.
Laser Cutting Acrylic
Laser cutting is commonly used when complex shapes, repeatability, or a high level of dimensional accuracy is required. It is particularly suitable for letters, display parts, decorative panels, signs, and custom components.
Laser parameters vary according to acrylic type, thickness, laser power, machine configuration, and desired edge finish. Test cuts should be performed before processing an entire production batch.
Preparing the Workspace
Good cutting quality begins before the machine is switched on. The acrylic needs a flat, clean, and stable work surface that prevents flexing and protects the finished surface.
- Flat Support: Support the acrylic across as much of its area as possible.
- Clean Surface: Remove chips, screws, and debris that could scratch the sheet.
- Secure Clamping: Prevent movement without applying excessive clamp pressure.
- Good Visibility: Clearly visible cutting marks improve accuracy.
- Dust Control: Use extraction or ventilation where cutting produces significant dust or fumes.
Finishing Acrylic After Cutting
Saw-cut acrylic edges may require additional finishing depending on the application. A structural or hidden edge normally requires less finishing than a visible display edge.
Sanding
Sanding can remove saw marks and smooth rough edges. The process normally starts with a suitable abrasive and progresses toward finer grits when a smoother finish is required.
Routing
Routing is useful for trimming edges to final dimensions and producing straight, consistent finished edges. It is commonly used in professional acrylic fabrication.
Polishing
Acrylic edges can be mechanically polished after sanding when a clearer and glossier finish is required.
Flame Polishing
Flame polishing can create a transparent edge on suitable acrylic parts, but it requires experience and accurate heat control. Excessive heat can damage the edge or introduce stress into the material.
Common Acrylic Cutting Problems
Common Mistakes to Avoid
- Using the Wrong Blade: Standard coarse wood-cutting blades can leave badly chipped acrylic edges.
- Removing Protective Film Too Early: Keep the film in place during normal cutting whenever practical.
- Poor Material Support: Unsupported sections can vibrate and crack.
- Forcing the Cut: Excessive feed pressure can increase heat and edge damage.
- Incorrect Measurement: Check measurements before cutting because acrylic cannot be restored once material is removed.
- Skipping Test Cuts: Machine settings should be verified on scrap material before valuable parts are processed.
Applications of Cut Acrylic Sheets
Cut and fabricated acrylic is used throughout commercial, industrial, retail, architectural, and decorative projects.
- Retail Displays: Display stands, product holders, showcases, and merchandising fixtures.
- Signs: Letters, panels, illuminated signs, logo displays, and directional signage.
- Interior Design: Decorative panels, partitions, furniture components, and wall features.
- Lighting: Diffusers, covers, decorative panels, and custom lighting components.
- Architecture: Transparent panels, protective screens, interior partitions, and decorative structures.
- Fabrication: Machine guards, covers, enclosures, prototypes, and custom industrial parts.
Choosing the Right Cutting Method
There is no single cutting method that is suitable for every acrylic sheet. Thin sheets and simple cuts may only require scoring, while thicker panels or large production quantities are normally better suited to powered cutting equipment.
Straight cuts can be handled efficiently with suitable saws, curved profiles with jigsaws or bandsaws, and detailed shapes with laser cutting or CNC equipment. The best choice depends on sheet thickness, cut geometry, tolerance, production quantity, and required edge quality.
Contact Us
If you have any enquiry about quotation or cooperation, please feel free to use the following enquiry form. Our sales representative will contact you within 24 hours. Thank you for your interest in our products. "*" Indicates the Fields are Mandatory
Related Posts
Request A Quote! We'll respond as soon as possible(within 12 hours)
Leave A Message